

PRODUCT · GUIDE
Fuzai Qixing Guide
Reordered, transcribed and illustrated from the supplied generation-3 printed manual. Read the ten-chapter guide below, or view/download the rebuilt PDF in the matching language.
01 · GUIDE
Identify the core and accessories
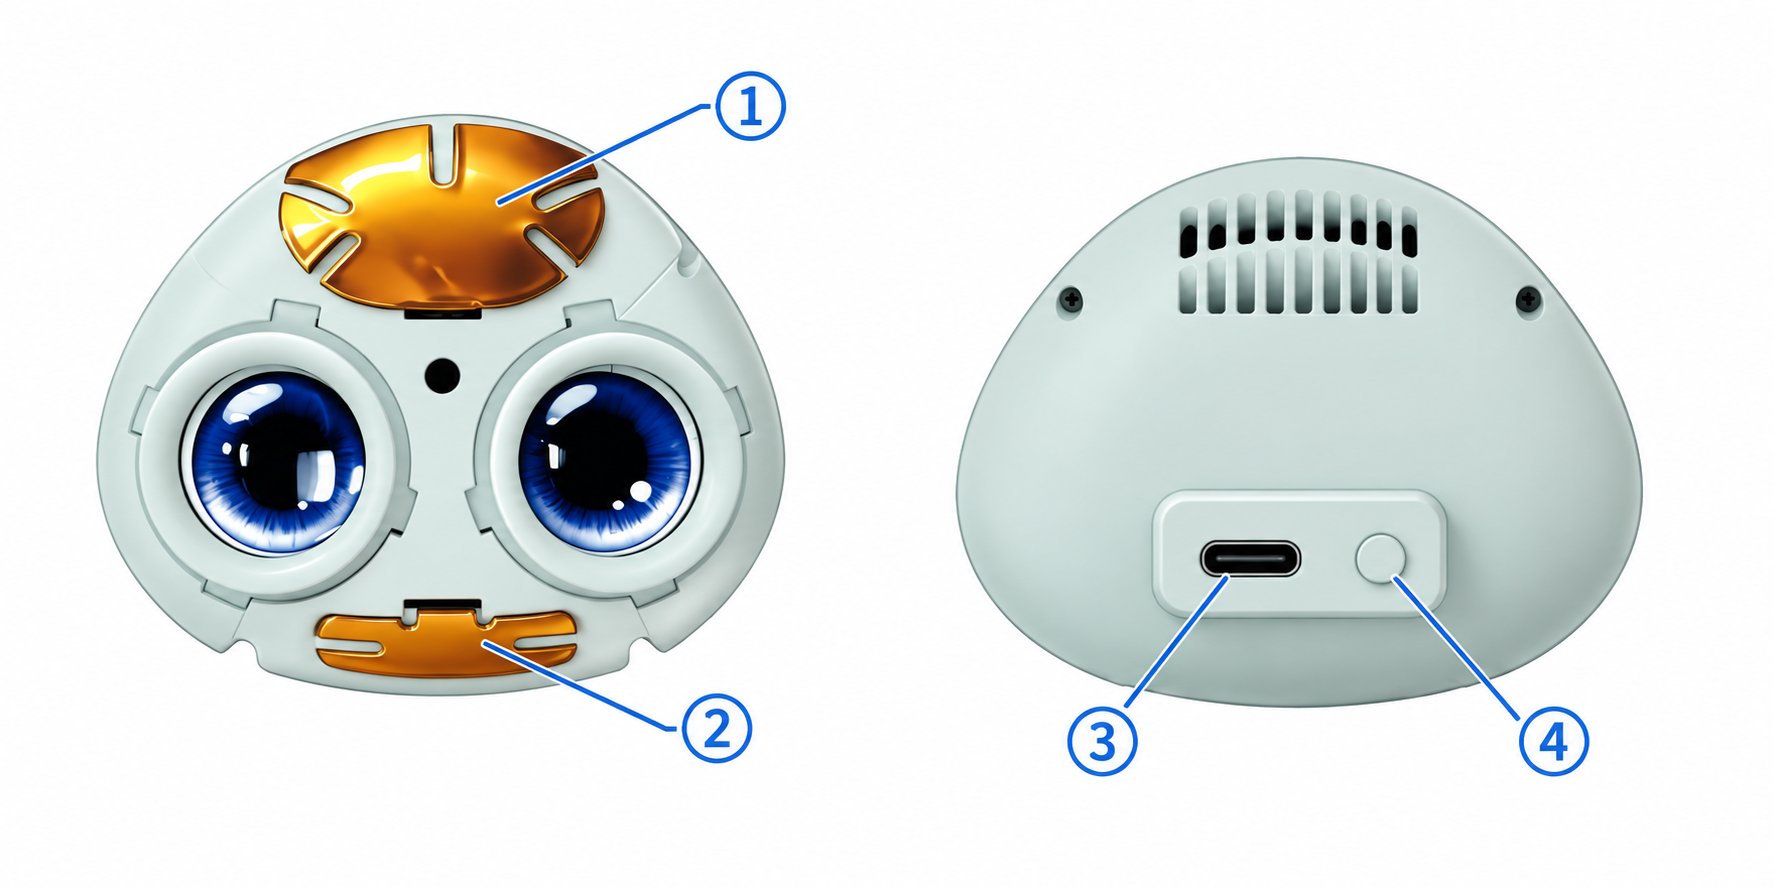
This guide follows the generation-3 integrated-core manual assigned to Fuzai Qixing. The finished product follows the new original and side photos; the core illustration is not an old plush main image. Dimensions follow the actual new shell.Diagram: 1 upper copper touch area; 2 lower copper touch area; 3 rear Type-C port; 4 rear power/pair button. These identify functions and do not instruct removal or disassembly.
The generic manual covers Wi-Fi and 4G hardware variants. It does not establish that Fuzai includes 4G. Cellular instructions apply only to confirmed 4G hardware.
The source package list contains one device, one manual and one Type-C cable. The power adapter is sold separately.
02 · GUIDE
Charging, lights and specifications
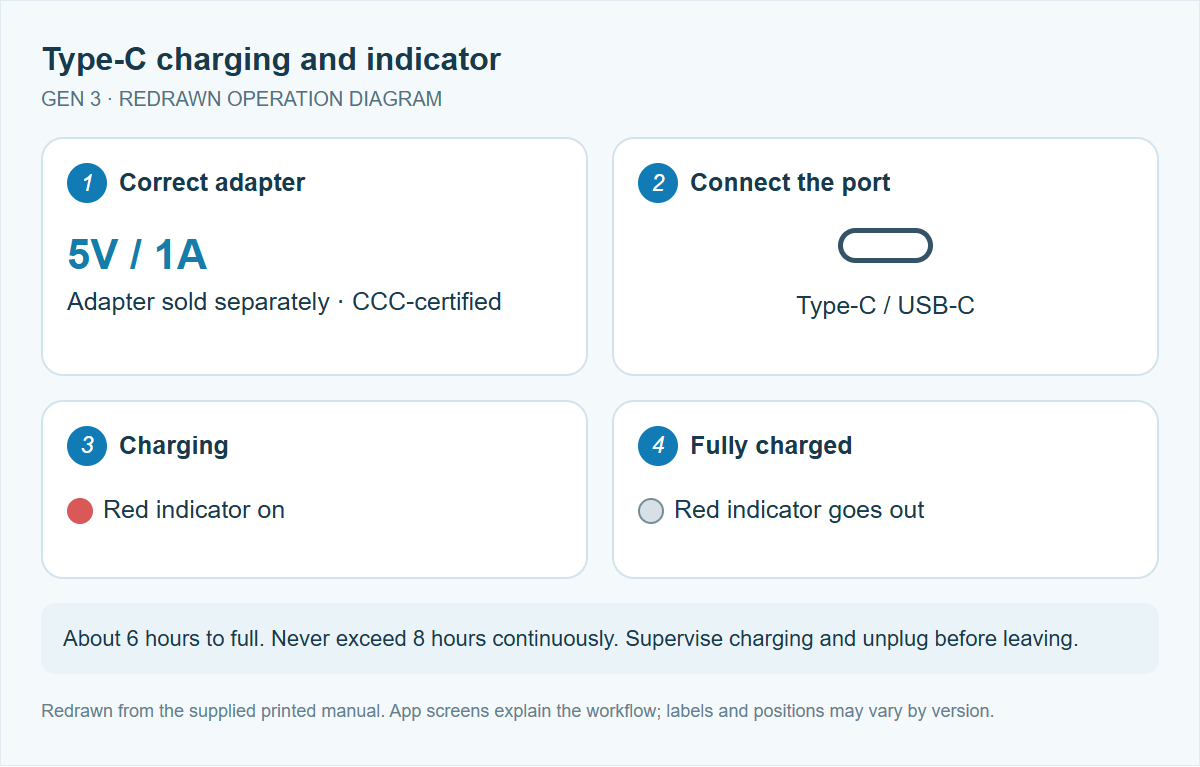
Connect the Type-C cable to the device. Use a certified adapter rated 5V/1A; the source specifies CCC certification. Adapter sold separately.A full charge generally takes about 6 hours, with possible variation. The indicator beside the port is red while charging; the red light goes out when full.
Do not charge continuously for more than 8 hours. Supervise charging and disconnect before leaving for a long time. Chargers must be used by adults or under adult supervision. Stop using damaged cables, plugs or casings.
Core specifications in the supplied manual: SUPER BALL; 1000mAh for Wi-Fi hardware, 1200mAh only for the 4G variant; 3.7V lithium battery; maximum power 5W. Materials: electronic components and plastic core. Origin: China. The standard field is blank in the source.
03 · GUIDE
Power and pairing controls
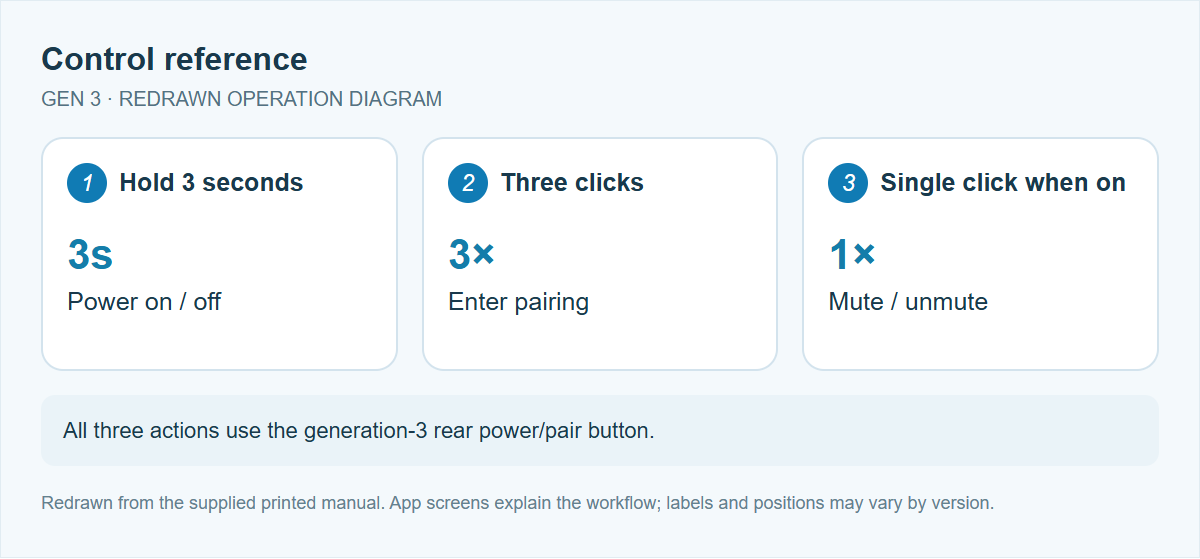
Hold the rear power/pair button for 3 seconds to power on. Light through the button indicates power on. Hold again for 3 seconds to power off; the light goes out.While powered on, press the rear button three times to enter pairing.
Single-click to mute, and click again to unmute. A short click is different from holding to power off.
04 · GUIDE
Tuya app and first connection
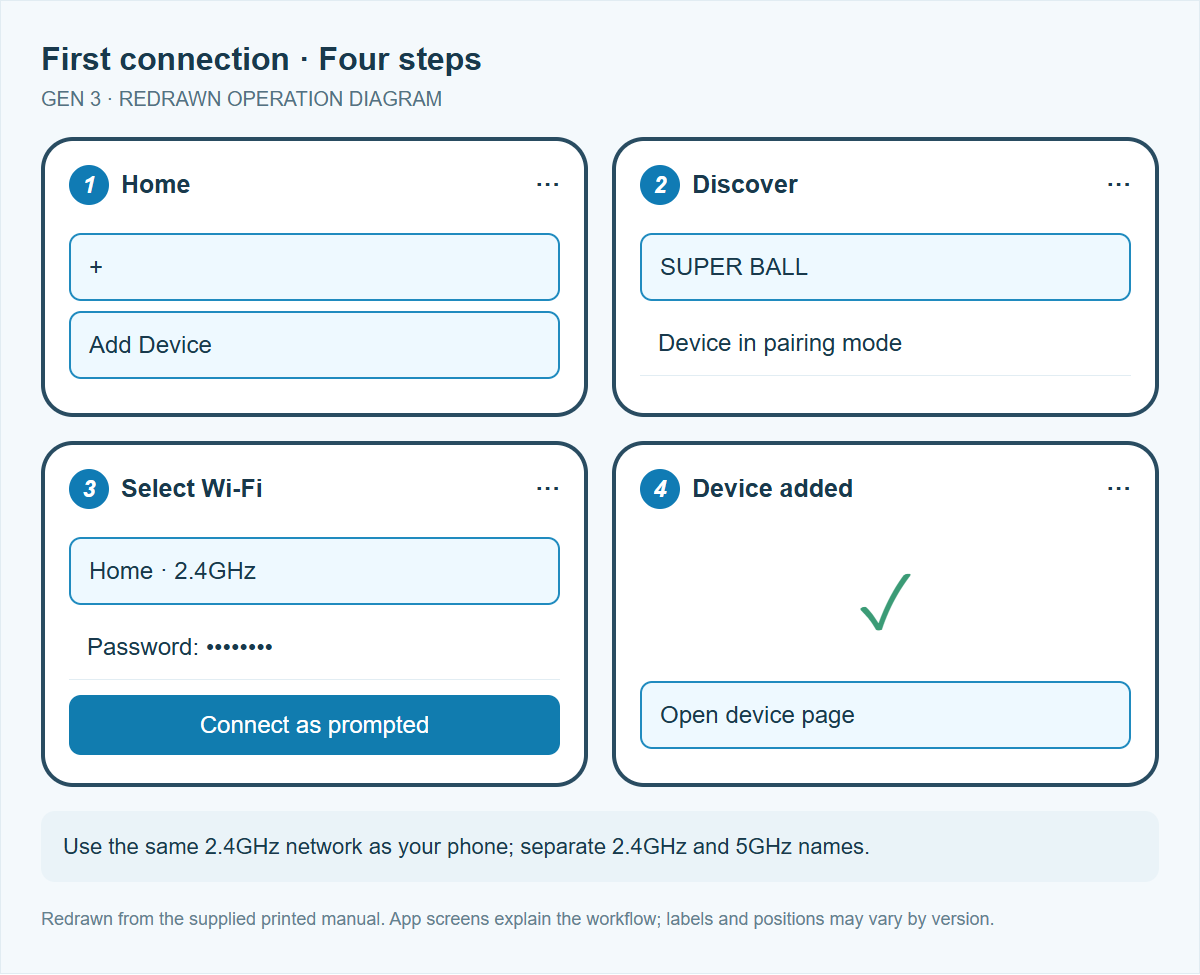
1. Search for “Tuya” in your phone’s app store, install or update the app, and sign in or register.2. Connect the phone to a separately named 2.4GHz Wi-Fi network. The supplied manual excludes 5GHz-only networks and shared-name 2.4/5GHz networks; separate the names in router settings if needed.
3. Power on as described in Chapter 3 and press the rear pairing button three times to enter pairing mode.
4. Tap “+” on the Tuya home screen, then Add Device, and select the discovered device.
5. Select the same 2.4GHz network as the phone, enter its password as prompted, and wait for successful addition.
6. Open the device page and try a conversation. If not found, check charge, pairing mode and Wi-Fi band before retrying.
The generation-3 device shown in the source is named SUPER BALL.
05 · GUIDE
Volume, history and roles
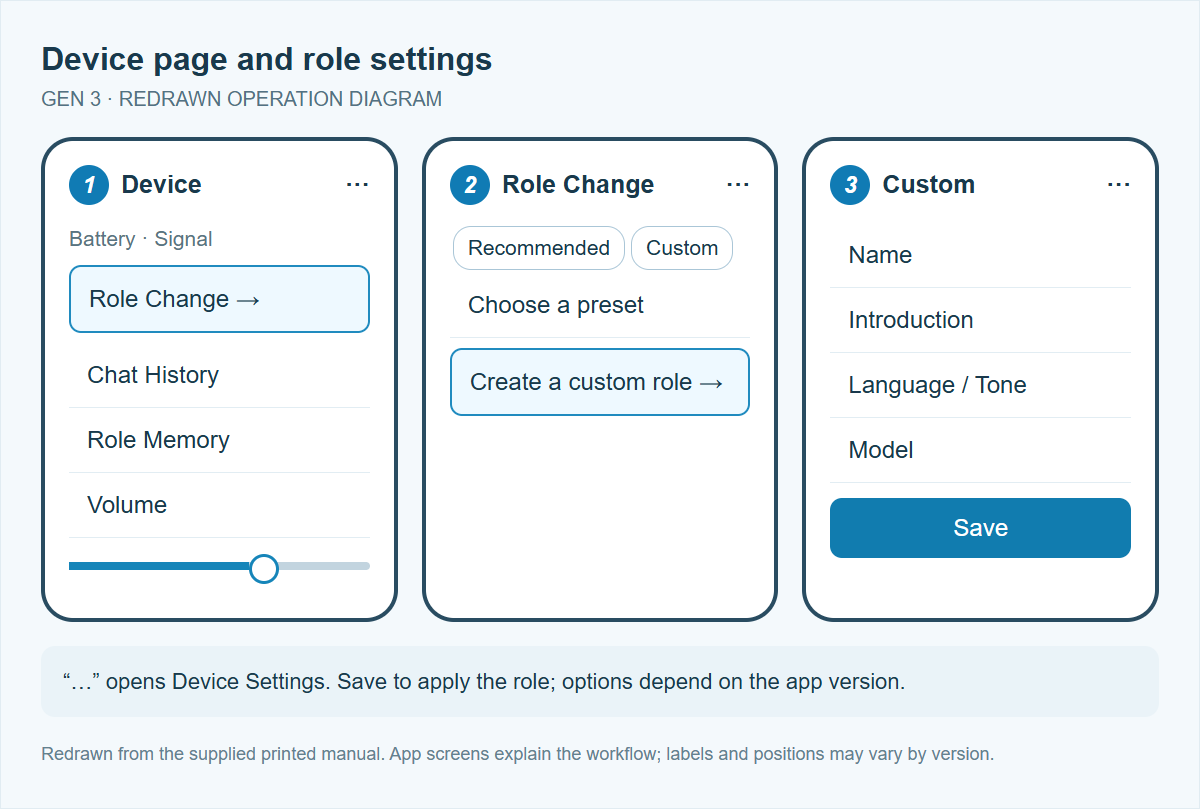
1. Tap an online device on the Tuya home screen. On the device page, check battery and signal, open chat history and role memory, and adjust volume.2. Select Role Change to choose a recommended role, or open Custom to create one.
3. Enter Name and Introduction; choose Language, Tone and Model from the available options. If shown, Optimize can help revise the introduction. Tap Save to apply the custom role.
4. The supplied manual describes memory and learning for default and custom roles. Available roles, models and labels depend on the actual app version. Open the top-right “…” menu for Device Settings.
The redrawn diagram explains navigation from the legible scan text; it is not a pixel-perfect screenshot or a guarantee of specific models.
06 · GUIDE
Conversation, mute and wake
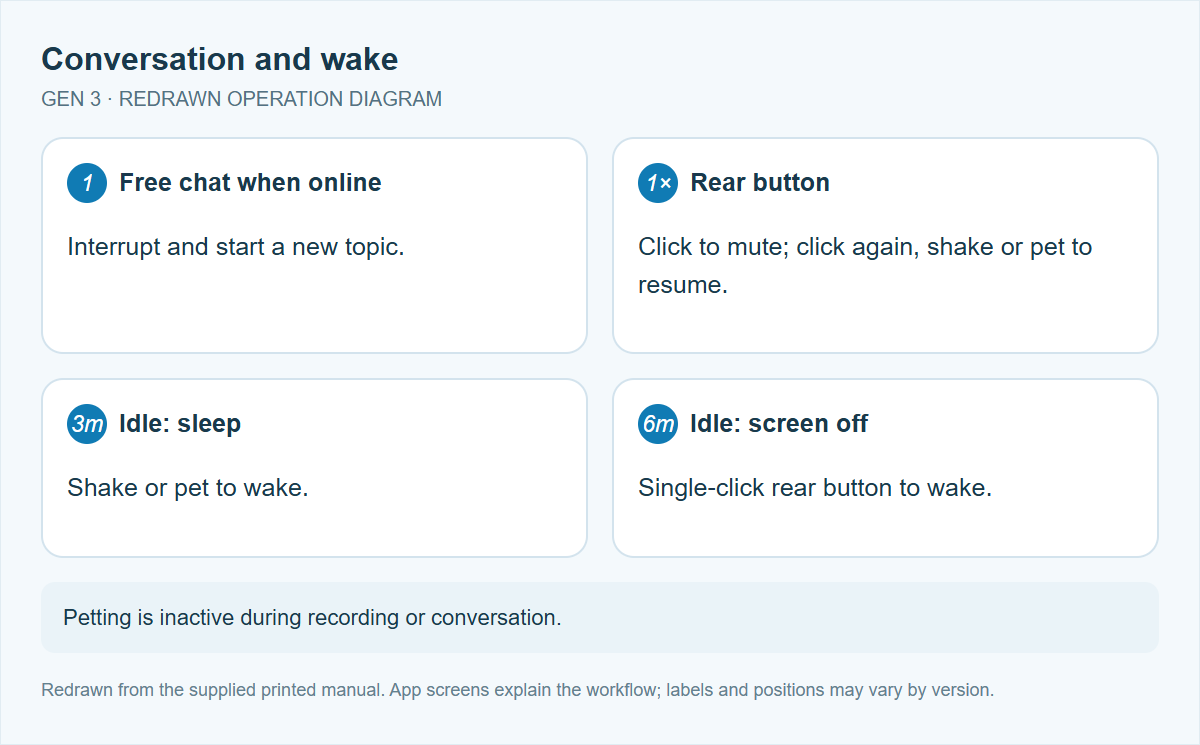
Once connected, the device enters free chat. Interrupt and start a new topic at any time.Single-click the rear button to mute. Click again, shake or pet to resume.
After 3 minutes without activity, the device sleeps; shake or pet to wake. After 6 minutes without activity, the screen goes off; single-click the rear button to wake.
Petting is inactive while recording or chatting. End the conversation before trying touch interaction.
07 · GUIDE
Touch and expressions
Petting activates on power-up. Bring your hand within 1cm of a copper touch area; the indicator lights and preset audio plays.Upper area (1): cheerful humming with a happy animated expression.
Lower area (2): annoyed or unusual humming, matching animated expressions and vibration.
Petting is inactive during recording or conversation. These are the core functions in the source manual; use the corresponding accessible area of the finished product without dismantling it.
08 · GUIDE
Useful voice commands
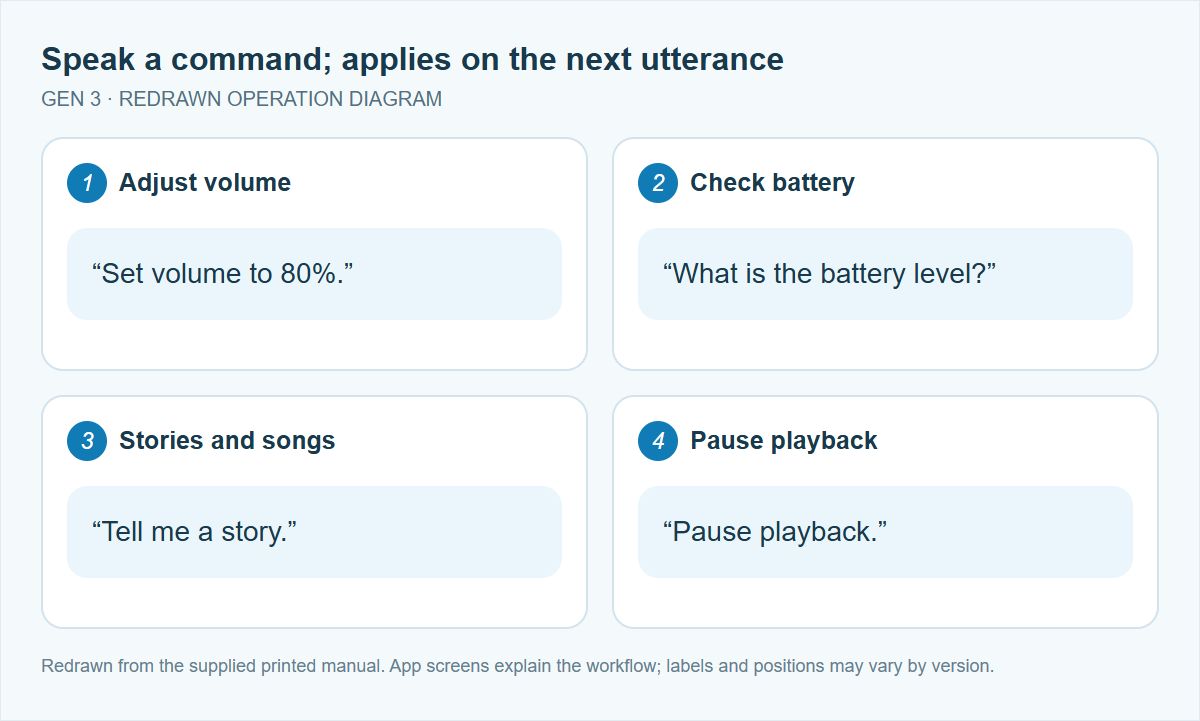
Speak commands in conversation mode. Adjustments take effect with your next utterance after the device receives the command.Volume: “Your voice is too loud / too soft”; “Set the volume to 80%.”
Check: “What is the current volume?”; “What is the current battery level?”
Voice / role: “Switch to the XX role.”
Language: “Can we talk in English?”
Speed: “Set speech speed to 50 / 80.”
End: “Stop talking”; “I do not want to chat anymore.”
Screen: “Turn off / on the screen”; “Open / close your eyes.”
Media: “Tell me a story”; “Play a song.”
Pause: “Pause playback”; “Stop playback.”
Expression: “I am so sad today”; “I am angry”; “I am very happy.”
09 · GUIDE
Firmware and 4G options
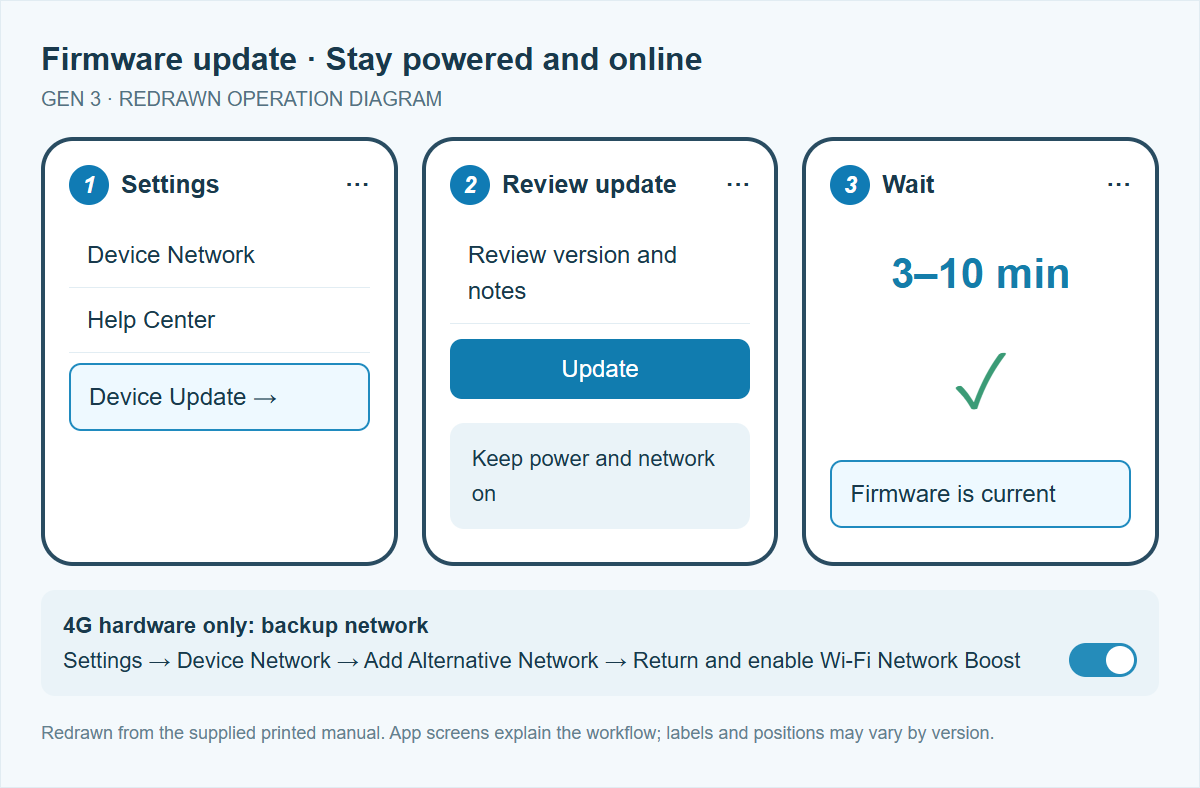
With the device online, open its page, tap the top-right “…” menu, scroll to Device Update, review the offered version and release notes, then tap Update.The supplied manual estimates 3–10 minutes. Keep the device powered and connected during the update. Completion shows that the firmware is current. Version numbers in the old scan are examples, not a claim about the latest firmware.
Confirmed 4G hardware only: low charge prevents mobile-network pairing. The source instructs cancelling Wi-Fi selection and returning to Add Device to connect through the mobile network.
To switch from 4G to Wi-Fi, pair again. Once online, open Device Settings → Device Network → Add Alternative Network. After adding it, return and enable Wi-Fi Network Boost. These settings do not add cellular hardware to a Wi-Fi-only unit.
10 · GUIDE
Safety, cleaning and service
Safety and storageUse at 0–40°C and store in a cool, dry place. Avoid direct sunlight, fire, heat, extreme temperature and very low air pressure. Do not impact, squeeze, puncture, dismantle, repair or modify the device. The built-in lithium battery is not user-replaceable; contact service if damaged.
Children require adult supervision. Check condition, installation and operation before use. Dispose of packaging safely to avoid suffocation. Stop using damaged devices, accessories, chargers or cables, or abnormal charging; contact service and do not resume until repaired. Never charge near sinks, bathtubs or other wet locations.
Cleaning
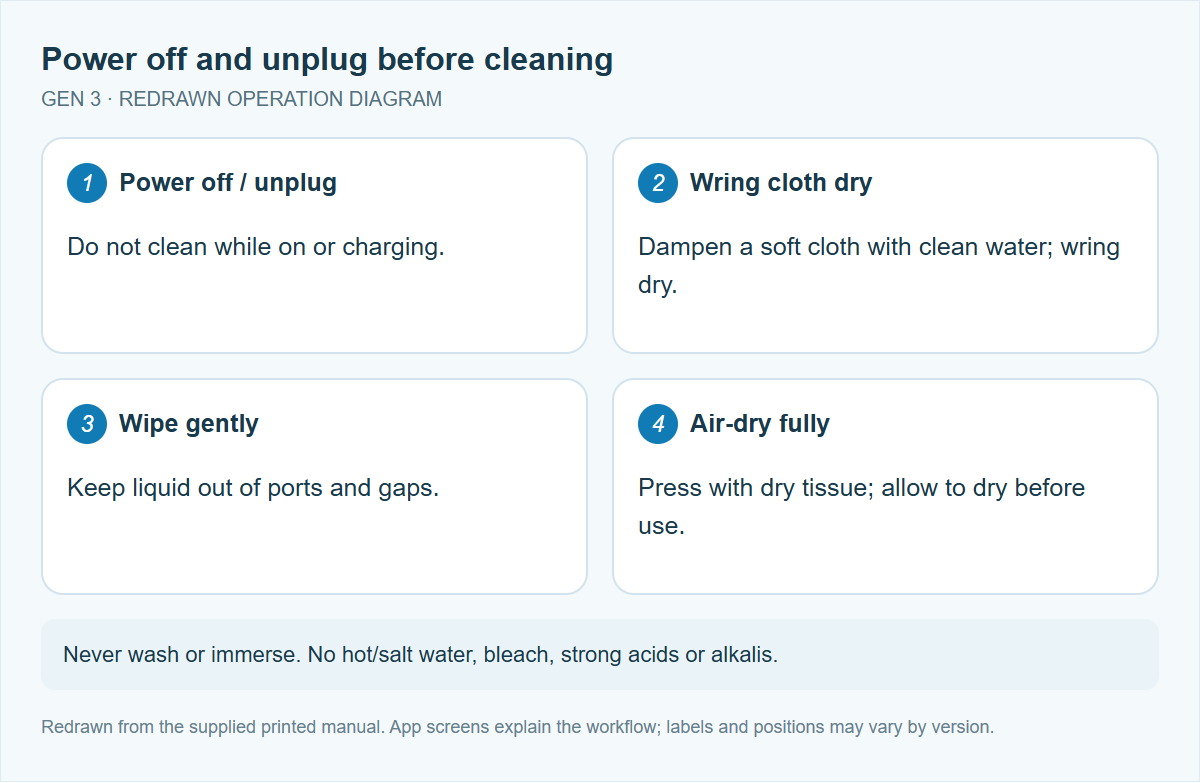
Power off and unplug first. The product is not waterproof: do not wash or immerse. Do not use salt water, hot water, bleach, strong acids or alkalis. Dampen a soft cloth with clean water, wring it dry and gently wipe. Press away excess moisture with a dry tissue; air-dry fully before use. Keep liquid out of ports and gaps. Contact service for stubborn stains.
Warranty and service
The supplied manual states that confirmed non-human-induced performance faults receive free repair within one year from purchase and acceptance. Contact the seller for returns/exchanges and retain the warranty card and receipt. Zoowai policy: one-year warranty for non-human-induced faults; paid repair for accidental damage or expired warranty; repair shipping is paid by the customer. See PDF appendices for the manual’s exclusions, disclaimer and blank service record.
NEED MORE HELP?