

PixelClock Routes an LED Strip Through a 3D-Printed Frame
导读
Hackaday reports that Dom Dominici’s PixelClock routes a continuous 2.5-meter WS2812B strip through a 3D-printed frame to make a 7×19 display, avoiding individual LED wiring, though some LEDs are hidden in the folds. An ESP32 WROOM controls it; setup uses a web interface and firmware can be installed via WebSerial. The printed diffuser supports filament color changes and CAD customization. The article says it saw the clock in person but gives no quantified performance tests.
正文
配图暂未加载。 查看来源原图 ↗
The availability of cheap addressable RGB LED strips has been a huge boon for hardware hackers, as it makes many projects far more accessible. This usually requires a lot of snipping, followed by the monotony of connecting up a bunch of fiddly jumper wires, but that’s still generally preferable to having to solder all of the LEDs individually.
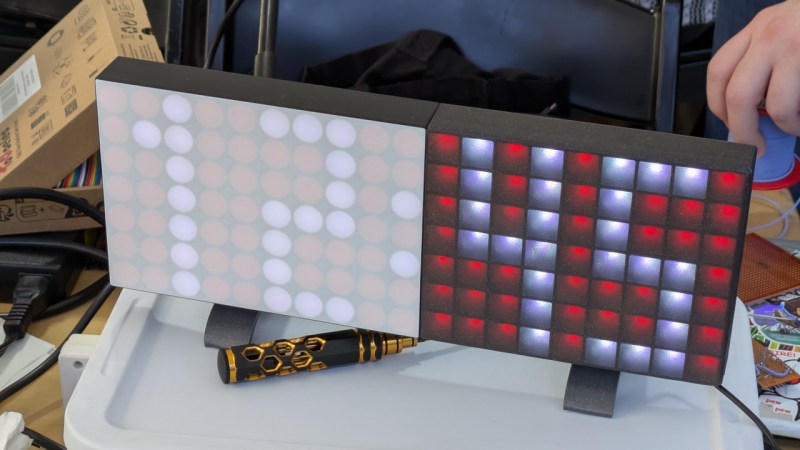
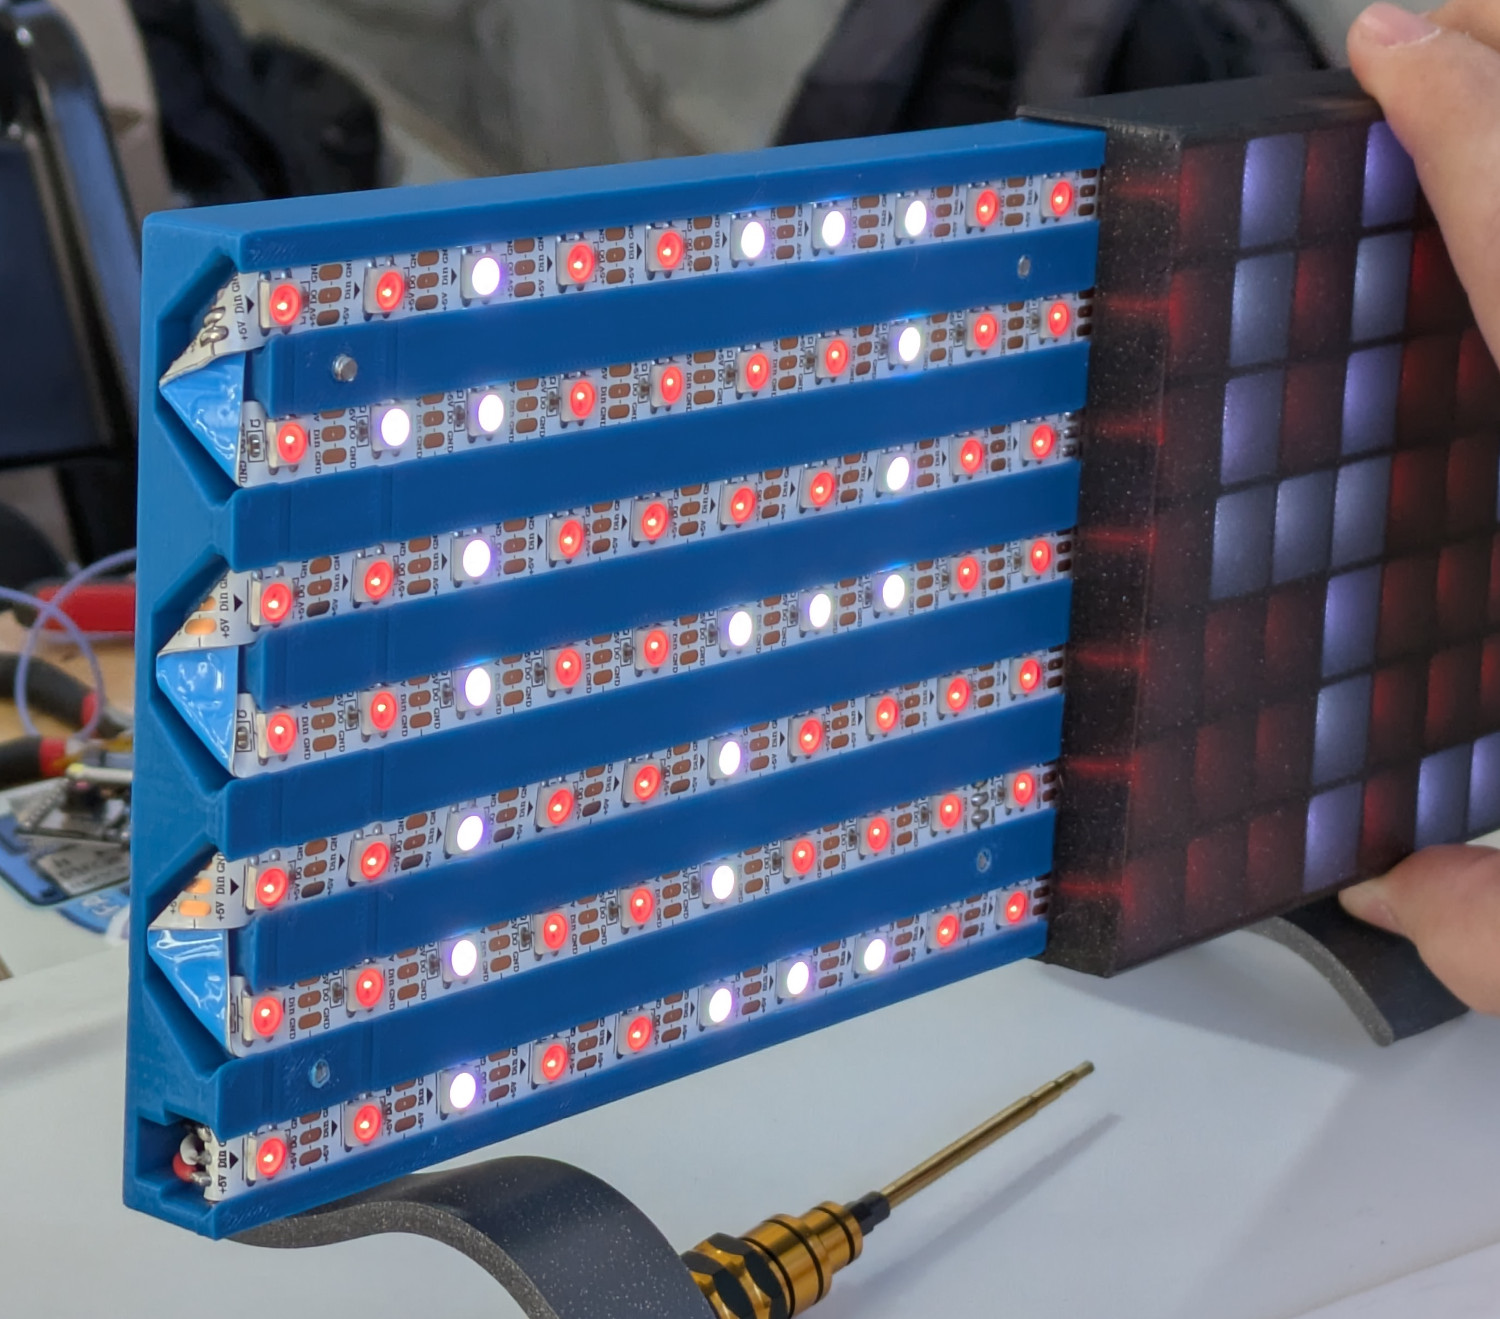
But what if you didn’t even have to do that? That was the goal of the brilliantly designed PixelClock by [Dom Dominici] — by carefully weaving a continuous 2.5 meter strip of WS2812B LEDs through its 3D printed structure, you can create a 7×19 display without any tedious manual work. Technically you do “waste” a few LEDs in the process since they’ll be on the inside of the folded strip, but that’s literally and figuratively a small price to pay for the added convenience offered by this approach.
We saw this one in person during Hackaday Supercon, and [Dom] tells us the whole idea was to make it as accessible as possible for new players. While we know there’s plenty of readers who actually enjoy the process of stripping and soldering wires, that’s not necessarily true for the average person. Of course the builder still needs to connect the end of the LED strip to the ESP32 WROOM development board that controls it, but that’s still a lot less intimating of a prospect for somebody that doesn’t breathe solder smoke on the regular.
配图暂未加载。 查看来源原图 ↗
The PixelClock is configured via a web interface running on the ESP32, so there’s nothing you need to install on your phone or computer to get it working. You can even install the firmware via WebSerial, making the build process that much friendlier.
One of the things we liked the most about the design is the printed diffuser — it might look like paper or some kind of opaque acrylic, but in actuality it’s just a couple layers of plastic. You can easily swap filament during the print to come up with different color variations, and for those that are comfortable in CAD, creating custom “pixels” is as easy as changing the shape of the individual LED compartments. Even in the bright Pasadena sunlight, the effect was impressive.
If you don’t mind cobbling together LED strips, this concept can be applied at a much larger scale.
this concept can be applied at a much larger scale
Source: Tom Nardi ·Hackaday · 2026-11-17T09:00:56.000Z · Read the original article
推荐理由
The article describes a concrete LED-clock assembly method and ESP32 setup; it provides no measured performance data, so broader performance claims remain unverified.
AI评分 57 · 查看评分依据
双模型按来源原文评估阅读价值,不判断事实真伪;本站整理正文仍应与原文核对。
- gpt-6-luna · 53
The article describes a concrete LED-clock assembly method and ESP32 setup; it provides no measured performance data, so broader performance claims remain unverified.
- deepseek-flash · 62
Original reporting on a specific physical build with concrete design, driving hardware, and configuration details, though performance claims are anecdotal rather than measured.
分析时间:2026.11.17 09:48 UTC







评论与解答 0